Editing a dimension using a spreadsheet
You can edit dimension values with a spreadsheet instead of using the dimension web page user interface. The dimension data that you can download as an Excel file includes all of the data that is currently available in the dimension editor on the web. Deleting dimensions in the downloaded spreadsheet does not remove the dimension from the system. In fact, if you have a large amount of data in the spreadsheet and to help improve performance, we recommend that you remove all the unchanged rows from the downloaded file before uploading.
TIP: Before you begin this process, we recommend that you first review the steps in this topic, including the Spreadsheet formatting section below.
To edit a dimension using a spreadsheet:
-
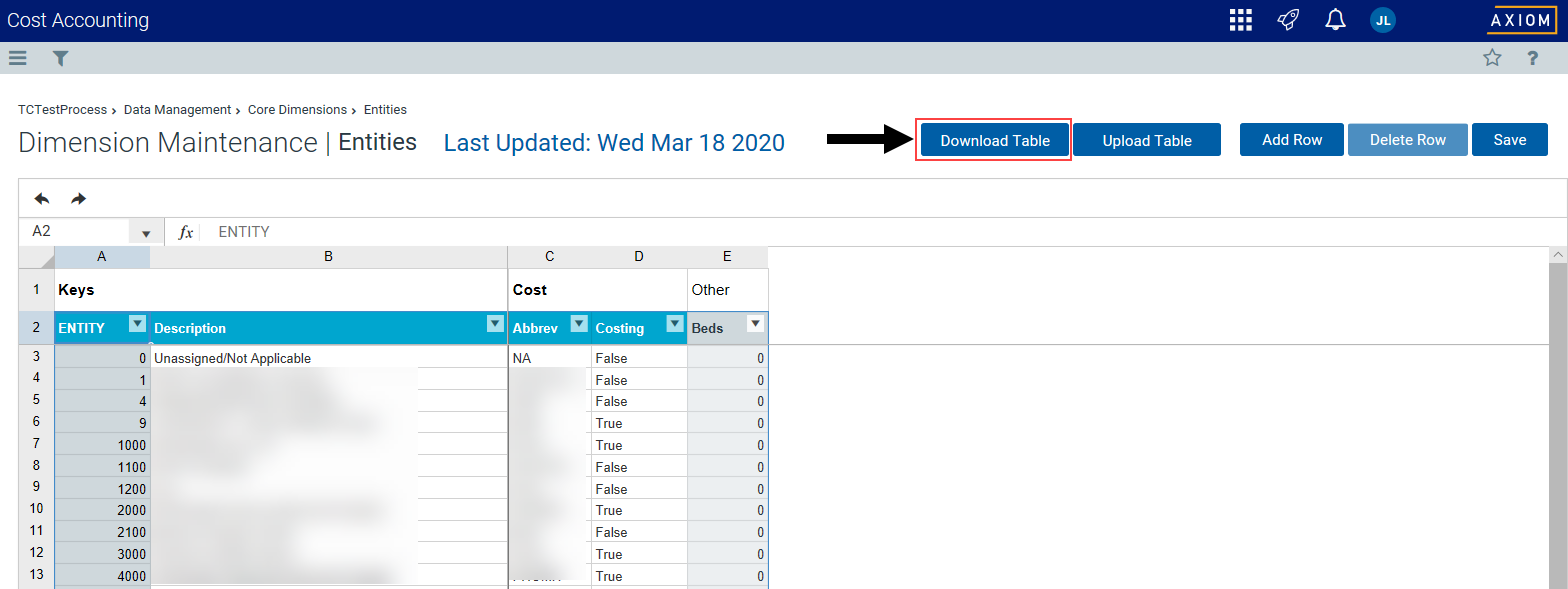
Open a dimension, and click Download Table.

Click image to view full size
-
Open the spreadsheet, or save the spreadsheet to a location first and then open it.
IMPORTANT: DO NOT rename the workbooks within the downloaded file.
-
Add a new dimension by adding a row, or edit the column information for an existing dimension. For columns that require a True/False (Yes/No) value, type 1 for True (Yes) and 0 for False (No). If adding new dimension rows, review the Spreadsheet formatting section below.
IMPORTANT: DO NOT add columns, change column names, or change sheet tab names.
- After making your changes, save the spreadsheet.
-
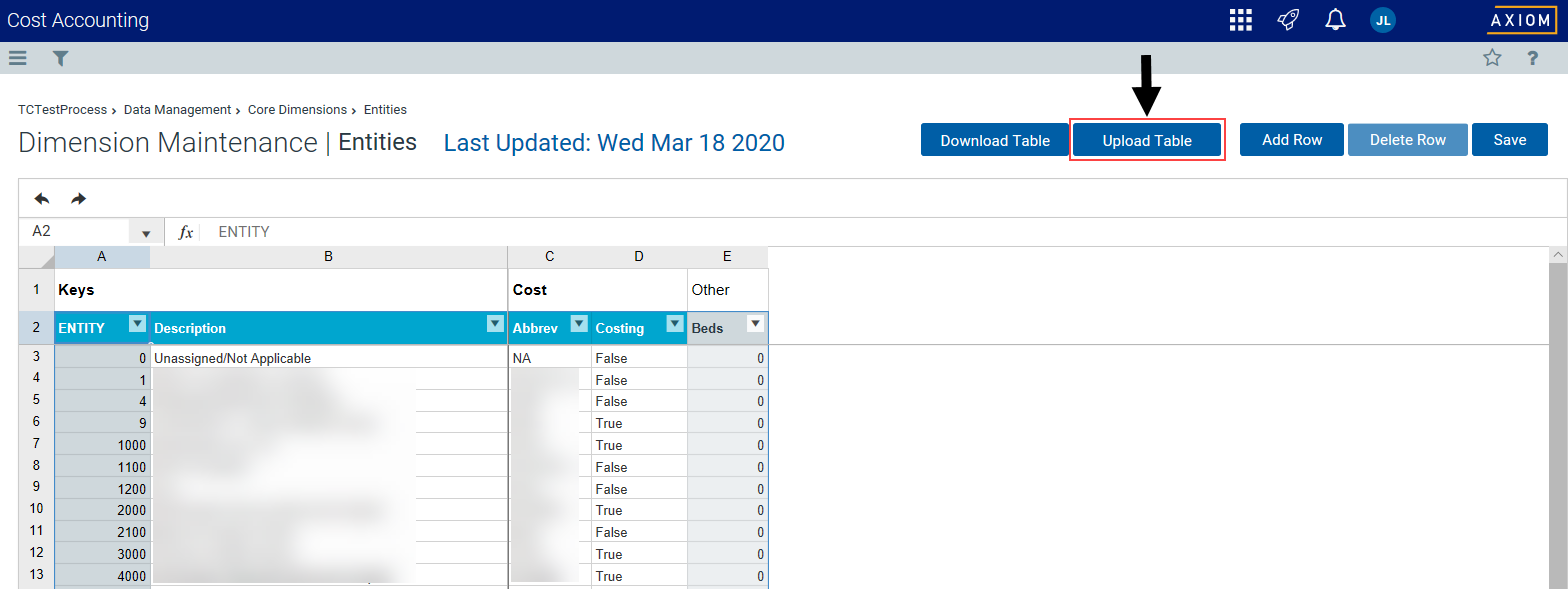
In the dimension editor page for the spreadsheet to upload, click Upload Table.
IMPORTANT: If the spreadsheet includes a lot of data, it may take several minutes for the upload to complete before the system displays a confirmation message.

Click image to view full size
-
The Review Uploaded Dimension Changes prompt displays information regarding the number of changes made, and the number of rows updated and/or added. Click OK.
NOTE: The system can only display up to 10,000 rows.
- The system displays the row(s) where changes occurred and/or new rows added in the Confirm Uploaded Data page. Do one of the following:
If the information is correct and you are ready to commit the changes to the system database, click Confirm Upload.
IMPORTANT: This action will save ALL of the CHANGED dimension rows that you upload, not just the rows that display within the web editor confirmation page. For example, if you upload 20000 rows of changes and set the filter (while in confirm mode) to the max 10000 records, you will only be viewing half of the changes that will be saved on Confirm.
- To correct the spreadsheet and/or make further changes, click Cancel Upload. Repeat the upload process starting with step 4.
- At the confirmation prompt, click OK.
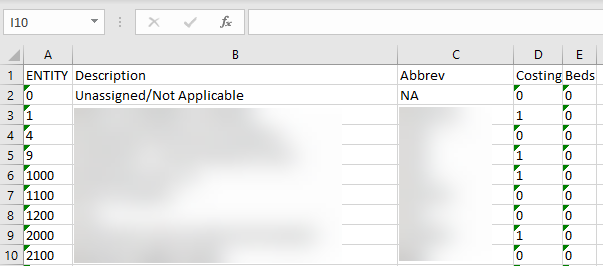
When downloading the dimensions values, they may display in the spreadsheet with General formatting. This is indicated by the green tick mark in the left corner in some cells—specifically number-based cells.
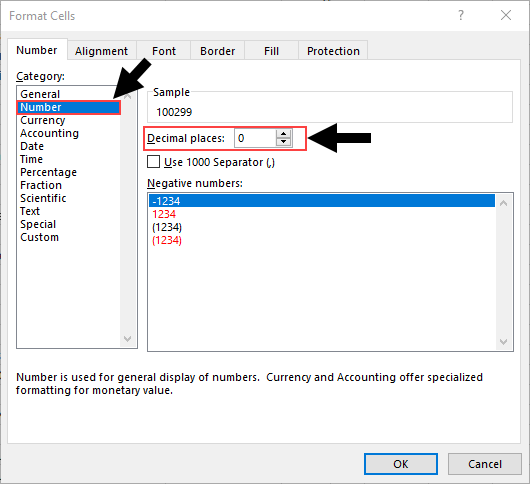
Large numbers
If you add new dimension rows that include large numbers, reformat them so they properly add to the database on return to the system by changing the number formatting to Number and the Decimal places field to zero.
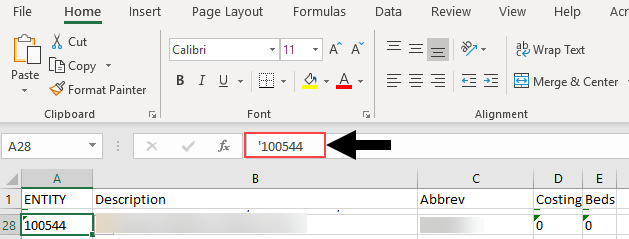
Leading zeroes
For numbers that include leading zeroes, change the formatting to Text.
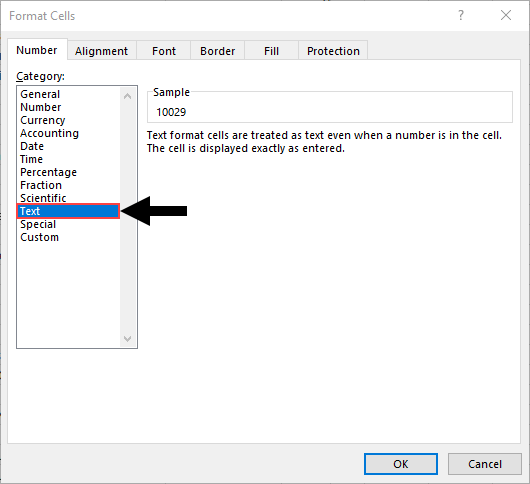
You can also simply add a single quote in front of the zero (this quote mark is not included in the data when it is uploaded).
Formulas
You can include formulas in the spreadsheet, and the system will only import the result into the database.
